準備:
- 可執行 Xcode 的作業系統
- GCM 需要實機測試,需要成為付費的 Apple 開發者帳號
撰寫程式碼前:
- 安裝 Cocoapods
- 打開終端機,輸入 sudo gem install cocoapods
- 等待下載和安裝完畢
- 將 Google SDK 加入 iOS app
- 建立一個 Xcode 專案,或者是現有專案
- 在專案中新增一個名為 Podfile 的檔案,打開並填入下列文字
- 使用終端機並指向該專案目錄底下
- 在終端機輸入 pod install
- 該專案會產生新的 .xcworkspace 檔案,之後便透過此檔案來開啟專案
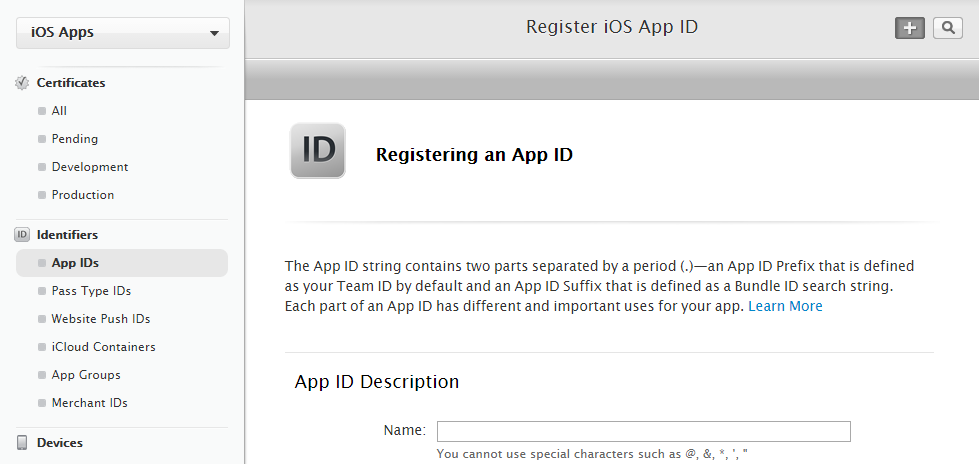
- 至 Apple Developer 網站註冊該專案專屬的 App ID
- 遵循網站步驟填資料

- Enable Service 需勾選 Push Notifications
- 產生 Apple Push Notification Service SSL 憑證
- 打開 Mac OS 的鑰匙圈,選擇上列鑰匙圈存取 -> 憑證輔助程式 -> 從憑證授權要求憑證

- 名稱建議填寫 Apple Push Notification (Development),以求辨識。選擇儲存到硬碟

- 至 Apple Developer 網站編輯剛才建立的 App ID,在 Development SSL certificate 選擇 Create Certificate, 將前一步驟產生的 certSigningRequest 檔上傳。之後 Download 網站產生好的 Development SSL certificate. 點兩下執行。

- 重複上列步驟將 Production SSL cerificate 也建立完成。Development 供開發時需要,Production 為上架時需要,之後 Google 需要這兩個憑證。
- 至 Apple Developer 網站建立 iOS Provisioning Profile
- 通常一般專案不需要特定建立專屬的 Provisioning Profile, 但是推播服務需要。

- 選擇 iOS App Development, 並接下執行,完成後 Download 並執行即可。Provisioning Profile 便會自動關聯 Xcode
- 輸出 Apple Push Notification 憑證
- 在鑰匙圈的左邊類別選擇憑證,將第4步驟的 Development 和 Production SSL certificate 右鍵輸出

- 到 Google Developer 建立應用程式,並上傳第6步驟的兩個憑證
- 至 https://developers.google.com/cloud-messaging/ios/client 點擊 Get a Configuration File 按鈕

- 輸入隨意的 App Name 以及 Xcode 專案的 iOS Bundle ID
- 上傳兩個憑證至對應的 Development 和 Production
- 成功之後便能下載 GoogleService-Info.plist 檔案

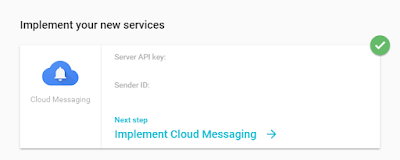
- 頁面往下拉會看到 Server API Key 和 Sender ID, 需要記錄下來
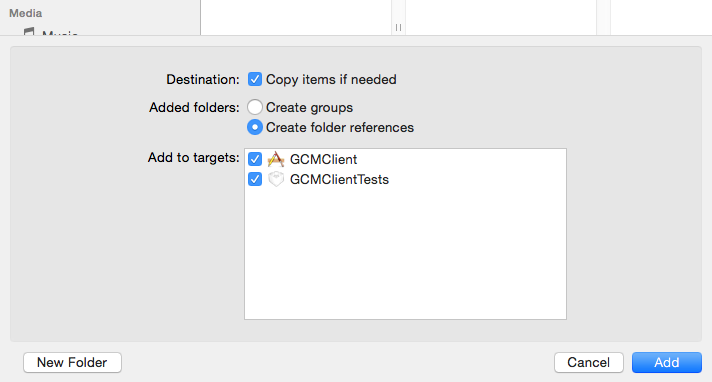
- 將前一步驟的 GoogleService-Info.plist 檔案加到 Xcode 的每個 target 裡
- 在 Xcode 專案按右鍵,點選 Add Files to ...
- 選擇 GoogleService-Info.plist
- Add to targets 的欄位需全部勾選

source 'https://github.com/CocoaPods/Specs.git'
platform :ios, '8.1'
pod 'Google/CloudMessaging'


到此處一切都佈署好了,接著便進入程式碼階段。
- 需先至 Apple Push Notification (APN) Service 註冊,取得 DeviceToken
- 在 AppDelegate.m 的 didFinishLaunchingWithOptions 函式中加入下列程式碼
- 在相同的函式中,需要取得在 GoogleService-Info.plist 裡的 gcmSenderID. 程式碼寫法如下
- 向 Google 註冊 DeviceToken 和 gcmSenderID
- 當 App 成功向 APN Service 註冊時,會自動執行 didRegisterForRemoteNotificationsWithDeviceToken 函式,將 DeviceToken 與 gcmSenderID 向 Google 註冊
- 上面的 _registrationHandler 用來處理向 Google 註冊後要執行的函式,於是我們必須先在 didFinishLaunchingWithOptions 裡先實作這個 handler.
- 向 Google 註冊成功時,會取得 RegistrationToken, 這個 handler 會告訴我們 RegistrationToken 是什麼,透過此 RegistrationToken 才能讓 Server 發送推播
- 當 App 開啟時,接收訊息會執行 didReceiveRemoteNotification 函式,非實作必要
- 記得需要將 App 開啟 Background Mode 的 Push Notification 服務
- (BOOL)application:(UIApplication *)application
    didFinishLaunchingWithOptions:(NSDictionary *)launchOptions {
    UIUserNotificationType allNotificationTypes =  (UIUserNotificationTypeSound |
          UIUserNotificationTypeAlert |  UIUserNotificationTypeBadge);
    UIUserNotificationSettings *settings =  [UIUserNotificationSettings
          settingsForTypes:allNotificationTypes categories:nil];
    [[UIApplication sharedApplication] registerUserNotificationSettings:settings];
    [[UIApplication sharedApplication] registerForRemoteNotifications];
}
NSError* configureError;
[[GGLContext sharedInstance] configureWithError:&configureError];
NSAssert(!configureError, @"Error configuring Google services: %@", configureError);
_gcmSenderID = [[[GGLContext sharedInstance] configuration] gcmSenderID];
- (void)application:(UIApplication *)application
    didRegisterForRemoteNotificationsWithDeviceToken:(NSData *)deviceToken {
  [[GGLInstanceID sharedInstance] startWithConfig:[GGLInstanceIDConfig defaultConfig]];
  _registrationOptions = @{kGGLInstanceIDRegisterAPNSOption:deviceToken,
                           kGGLInstanceIDAPNSServerTypeSandboxOption:@YES};
  [[GGLInstanceID sharedInstance] tokenWithAuthorizedEntity:_gcmSenderID
                                                      scope:kGGLInstanceIDScopeGCM
                                                    options:_registrationOptions
                                                    handler:_registrationHandler];
}
[[GCMService sharedInstance] startWithConfig:[GCMConfig defaultConfig]];
  __weak typeof(self) weakSelf = self;
  // Handler for registration token request
  _registrationHandler = ^(NSString *registrationToken, NSError *error){
    if (registrationToken != nil) {
      weakSelf.registrationToken = registrationToken;
      NSLog(@"Registration Token: %@", registrationToken);
      [weakSelf subscribeToTopic];
      NSDictionary *userInfo = @{@"registrationToken":registrationToken};
      [[NSNotificationCenter defaultCenter] postNotificationName:weakSelf.registrationKey
                                                          object:nil
                                                        userInfo:userInfo];
    } else {
      NSLog(@"Registration to GCM failed with error: %@", error.localizedDescription);
      NSDictionary *userInfo = @{@"error":error.localizedDescription};
      [[NSNotificationCenter defaultCenter] postNotificationName:weakSelf.registrationKey
                                                          object:nil
                                                        userInfo:userInfo];
    }
  };
- (void)application:(UIApplication *)application
    didReceiveRemoteNotification:(NSDictionary *)userInfo {
  NSLog(@"Notification received: %@", userInfo);
  // This works only if the app started the GCM service
  [[GCMService sharedInstance] appDidReceiveMessage:userInfo];

}
App Client 一般這樣做就行了,接下來是 Server 端的程式,我將用 PHP 來實作。
- 建立 Payload
- 雖然是使用 Google GCM, 但推播發送的格式還是要按照 APN Service. 於是新版的 Google GCM 加入了相容於 APN Service 的格式
- $registerIds 就是 App 取得的 RegistrationToken, 記得寫上去
- 傳送訊息
$content = "GCM 推播測試!";
$registerIds = array();
array_push($registerIds, $registrationToken);

$message = array(
 'body' => $content,
 'badge' => 3
);
$fields = array(
 'registration_ids' => $registerIds,
 'notification' => $message,
);
$google_api_key = "從 Google Developer 取得的 Server API Key";
$url = 'https://android.googleapis.com/gcm/send';
$headers = array(
 'Authorization: key=' . $google_api_key,
 'Content-Type: application/json'
);
// Open connection
$ch = curl_init();

// Set the url, number of POST vars, POST data
curl_setopt($ch, CURLOPT_URL, $url);
curl_setopt($ch, CURLOPT_POST, true);
curl_setopt($ch, CURLOPT_HTTPHEADER, $headers);
curl_setopt($ch, CURLOPT_RETURNTRANSFER, true);

// Disabling SSL Certificate support temporarly
curl_setopt($ch, CURLOPT_SSL_VERIFYPEER, false);
curl_setopt($ch, CURLOPT_POSTFIELDS, json_encode($fields));

// result
$result = curl_exec($ch);
echo $result;
// Close connection
curl_close($ch);
這樣就算是大功告成了,透過這樣的方式就能收到推播。基本上要使用 Google GCM for iOS 時,Apple Push Notification Service 的步驟也差不多完成了。只差 Server 端還要改一下。
使用 Google GCM 的好處是不管 Android 還是 iOS, 用同一套 GCM Server 就可以了,根據我的實驗,iOS 收到訊息可能會 delay 很久,但當我使用 APN Server 發送一次訊息後,之後再用 GCM Server 送出推播就能很快的讓 iOS 收到。覺得 delay 很久的朋友不妨試試。
Google 有釋出範例程式,想清楚的看程式碼的朋友可去下載學習
本篇參考資料皆來自 Google Cloud Messaging.